How to write a check: A step-by-step guide


Key takeaways
- Writing a check requires six steps: date, payee name, amount in numbers, amount in words, memo (optional) and your signature.
- Always use blue or black ink — never pencil — to prevent alterations and fraud.
- The numerical amount and the written amount must match exactly, or the bank may reject or delay your check.
- Check fraud has surged in recent years, so take precautions like filling all blank spaces, storing checks securely and mailing them safely.
These days, most payments happen with a tap, swipe or a few clicks. But checks aren’t gone yet. Americans still wrote roughly 9 billion checks in 2025, and checks remain common for rent payments, large purchases, gifts and business transactions.
Whether you’re writing your first check or your first one in a long time, getting it right matters. A mistake can lead to delays, late fees or a bounced check. Use this step-by-step guide to fill out a check correctly the first time.
What you need to write a check
- A checking account with enough money to cover the check amount
- A pen with blue or black ink
- The payee’s full, correct name
- The exact dollar amount you’re paying
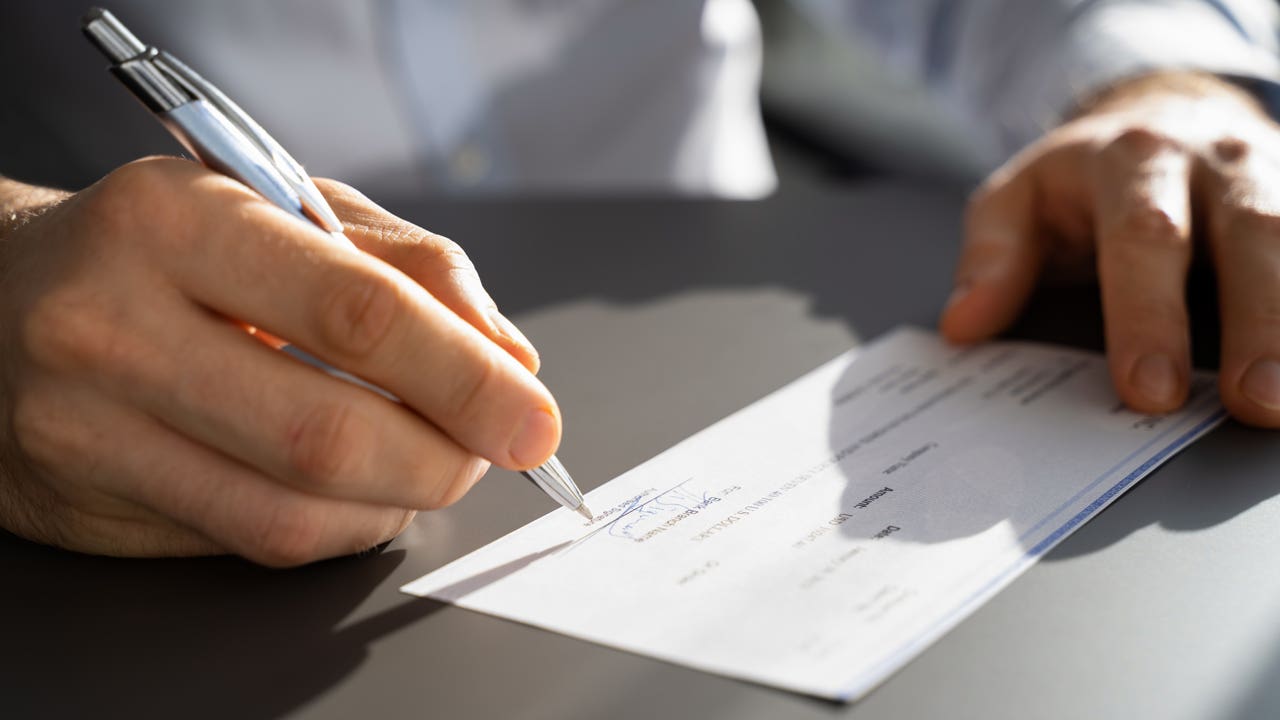
 Oddphoto/Getty Images; illustration by Bankrate
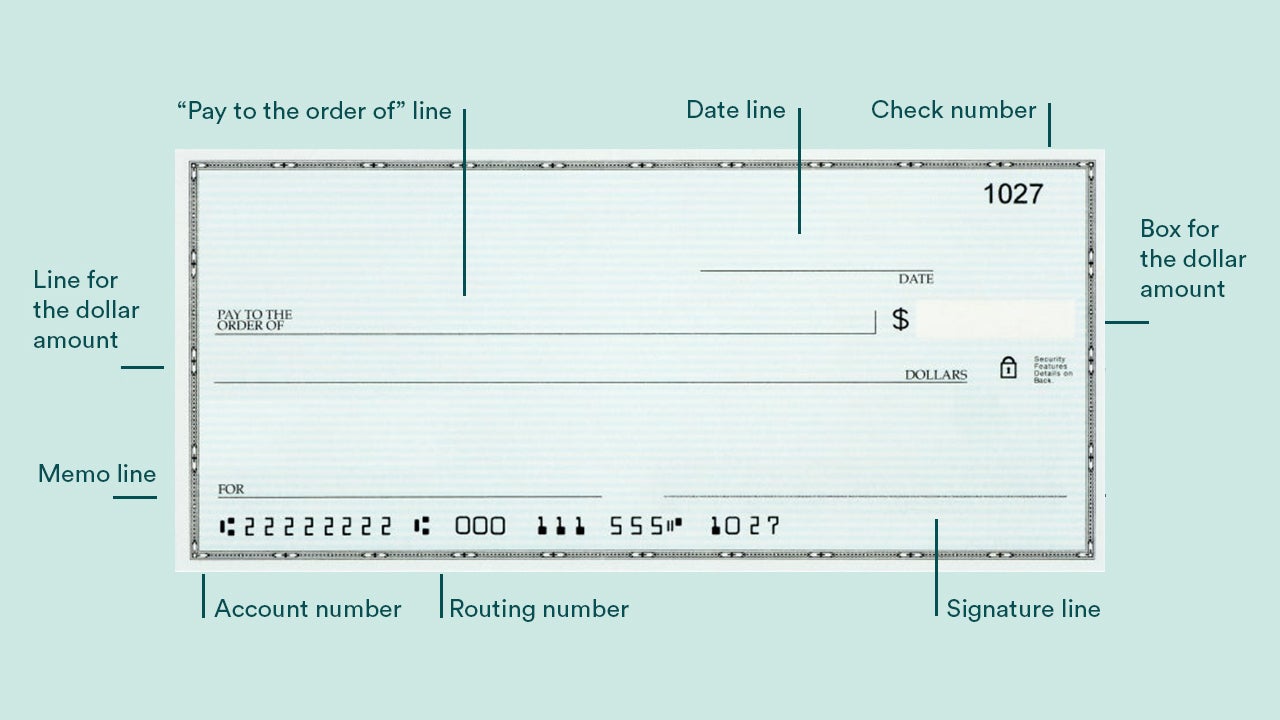
How to fill out a check in 6 steps
Before writing a check, you’ll need to have a checking account with sufficient funds to cover the amount of the check. Then, follow these steps to fill one out.
1. Write the date
Write the current date on the line in the top right-hand corner. This tells the bank and the recipient when you wrote the check. You can use numbers or long form — either “3/4/2026” or “March 4, 2026” works.
A note about postdating
2. Write who the check is payable to
On the line that says “Pay to the order of,” write the full name of the individual or company you’re paying. This person or entity is called the payee. Use their complete, legal name rather than a nickname to avoid confusion.
You can write “Cash” if you don’t know the payee’s name, but this is risky — anyone can cash or deposit a check made out to cash. It’s much safer to write a specific name.
3. Write the check amount in numbers
In the small box to the right of the payee line, write the numerical dollar amount clearly. For example, if you’re writing a check for one hundred dollars and thirty cents, write “$100.30.”
Write clearly and start as close to the dollar sign as possible so no one can add digits in front of your number.
4. Write the amount in words
On the line below “Pay to the order of,” spell out the dollar amount in words. This amount must match the numerical amount exactly. Write the cents as a fraction over 100.
Examples:
- $100.30 becomes “One hundred and 30/100”
- $50.00 becomes “Fifty and 00/100”
- $1,250.75 becomes “One thousand two hundred fifty and 75/100”
Even if you’re writing a check for a round dollar amount, include “00/100” for the cents portion. This prevents someone from adding cents to your check. Draw a line through any remaining blank space on the line.
5. Write a memo (optional but recommended)
The memo line at the bottom left is optional, but using it is smart. Write a brief note about the check’s purpose — for example, “Rent — March 2026” or “Invoice #4521.” This helps with your own recordkeeping and ensures the recipient can apply the payment correctly.
Some companies specifically request that you write your account number or invoice number in the memo field.
6. Sign the check
Sign your name clearly on the line at the bottom right corner of the check. Use the same signature that’s on file with your bank — mismatched signatures can cause processing delays.
Your signature authorizes the bank to pay the stated amount to the payee. Without it, the check is invalid.
How to write a check safely: Fraud prevention tips
Following these best practices helps prevent fraud, processing errors, and payment delays.
- Always use pen, never pencil. Write with blue or black ink only. Pencil can be erased and altered. Avoid other ink colors like red or green, which can cause problems with check-scanning equipment.
-
Write clearly. If your handwriting is hard to read, print in block letters. Unclear writing is one of the most common reasons banks reject checks.
-
Fill all blank spaces. Draw a line through any unused space after the written amount and start numbers as close to the dollar sign as possible. This prevents someone from adding words or digits.
-
Double-check everything before signing. Make sure the numerical amount matches the written amount, the payee’s name is spelled correctly and all required fields are filled in.
-
Keep records. Write down each check number, amount, payee and date in your check register or a budgeting app. Take a photo of the check before mailing it.
-
Store checks and mail them securely. Keep unused checks in a secure place at home — never in your car or bag. When mailing checks, drop them inside the post office or use your bank’s online bill pay to avoid mailing them at all. If checks are stolen, contact your bank immediately.
When you still need a check in 2026
Even as check usage has dropped — check payments fell from 6 percent to 2.5 percent of consumer transactions between 2015 and 2024, according to Atlanta Fed data — there are situations where checks are still commonly used or even required:
- Rent payments. Many landlords, especially individual property owners, still prefer or require checks.
- Large purchases. Some transactions like security deposits, contractor payments and vehicle purchases may call for a cashier’s check or certified check rather than a personal check.
- Gifts. Checks remain a common way to give money for weddings, graduations and holidays, especially across generations.
- Government and legal payments. Some courts, local government offices and tax authorities still accept or require checks for certain filings and fees.
- Business payments. Small businesses and sole proprietors frequently use checks for invoicing and accounts payable.
If you find yourself writing checks often, it’s worth making sure your checking account provides checks at a low cost (or free). Some accounts include free checks as a benefit.
Types of checks and when to use each one
Not every payment calls for a personal check. Here’s how the main types compare:
Personal checks are the standard checks from your checking account, used for everyday payments. They’re drawn directly from your account balance. Best for routine bills, rent and personal payments.
Cashier’s checks are issued and guaranteed by the bank itself. You pay the bank upfront, and they draw the check from the bank’s own funds. They typically cost $10–$15 and are often required for large transactions like home closings or vehicle purchases.
Certified checks are personal checks that the bank has verified and guaranteed. The bank confirms you have sufficient funds and sets that money aside. They offer more security than a standard personal check.. To understand the difference between cashier’s checks and certified checks, see our detailed comparison.
Money orders function similarly to cashier’s checks but are available at more locations — post offices, grocery stores, convenience stores — and are typically cheaper ($1–$5). They’re good for smaller amounts.
Where to get checks
- From your bank: Most banks provide checks, but they’re often more expensive than other options. Some checking accounts include free checks — check your account details first.
- Third-party check printers: Companies that specialize in printing checks typically charge less than banks. You’ll need your account number and routing number to order. For comparisons, see Bankrate’s guide to where to buy checks.
- Online ordering: Many services let you order checks online and have them delivered to your home. This is often the most convenient and least expensive option.
What to do next
- Protect your account: Learn how to avoid overdraft fees and other common charges.
- Find the right checking account: Compare features, fees and check-writing benefits.
- Earn a bonus: Some banks offer cash bonuses for opening a new checking account.
Why we ask for feedback Your feedback helps us improve our content and services. It takes less than a minute to complete.
Your responses are anonymous and will only be used for improving our website.

Up next


We appreciate your feedback
Thank you for taking the time to share your experience.