How to wire a light switch (safely)
The Bankrate promise
At Bankrate we strive to help you make smarter financial decisions. While we adhere to strict , this post may contain references to products from our partners. Here's an explanation for .
Many electrical jobs around the home are best left to the professionals, but changing out a light switch is one that can be done yourself. Using the DIY approach to change a light switch can not only save you time but also save you money. Hiring an electrician to change a light switch can run between $295–$595, but doing it yourself can cost less than $50. All you’ll have to shell out for is the switch itself, plus a few basic tools if you don’t already have them.
Here’s how to change out and wire a light switch — safely.
What you’ll need to wire a light switch
You’ll need a few tools to change a light switch. Along with the switch itself, you’ll also need:
- Wire strippers
- Wire cutters
- Flathead and Phillips screwdrivers
- Light switch
One item that you might not have but that is essential for this job is a voltage tester, according to Michael Clarke, contractor and founder of the home management platform Pulled, Inc. It’s crucial for gauging whether there’s still any electrical current once you turn the breaker off.
Once you have your materials assembled, you’re ready to wire a light switch.
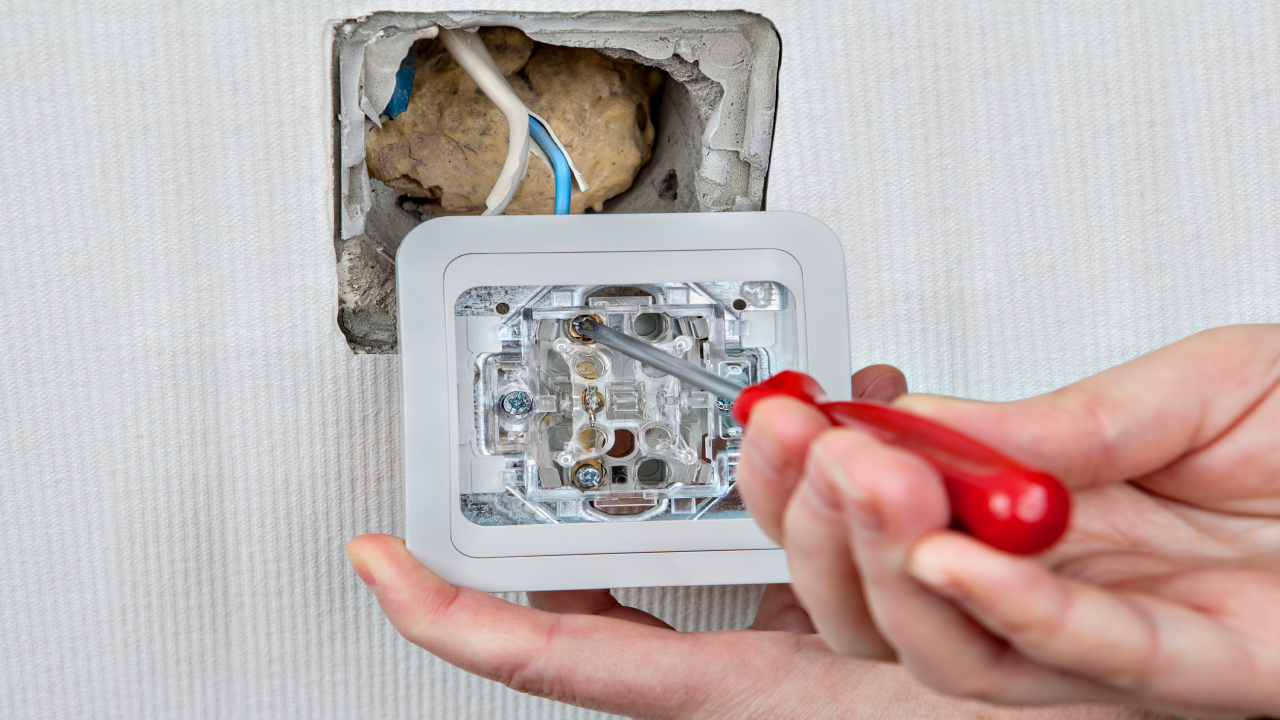
How to install a light switch
Safely replacing and installing a light switch takes several steps:
- In your home’s circuit panel, locate the breaker connecting the light switch.
- Turn off the breaker.
- Test that you’ve turned off the correct breaker by trying to turn on the light. If it turns on, you’ll have to go back to the circuit panel and find the correct breaker.
- Use the voltage tester near the light switch to test if there is any electrical current present. (Do not proceed if you detect any after one or two tests; you’ll need a pro.)
- Remove the switch plate using the flathead screwdriver.
- Use either the Phillips or the flathead screwdriver (depending on the heads of the screws) to remove the screws holding the switch inside the electrical box fitted in the wall.
- Once the switch is loose, gently pull it out of the box. Take a photo of the wiring of the light switch, then disconnect the wire from the light switch.
- Use the photo as a guide to connect the wires to the new light switch.
- Push the switch back into the wall box, then screw it in place using the screws from the old light switch.
- Put the switch plate back on using the existing screws.
- Turn the breaker back on.
- Check the light switch to ensure you have power again.
What does it cost to install a light switch?
The cost to install a light switch varies by the type of switch you plan to install. For instance, a single-pole 15 amp switch costs $15 or less. A dimmer light switch will cost a few dollars more, around $20. If you prefer a smart light switch that you can voice-activate with a virtual assistant like Alexa or Google Assistant, it will cost closer to $50 or more.
If you change the style of the light switch, you may also have to buy a new switch plate. For example, if you choose the more contemporary rocker switch (the type where one end depresses) to replace the traditional toggle light switch, a new plate will cost $10 or less to match the new light switch.
The final word on wiring a light switch
If you follow the step-by-step process to change a light switch, you should be able to complete this task as a DIY project. It’s not a difficult job, though you do have to be careful. However, if you can’t locate the right breaker to turn off the power or continue to get an electrical current reading with the voltage tester, you could be at risk of getting shocked or electrocuted. In these instances, it’s best to have a professional complete the project, advises Clarke.
Another tip he offers: Label your breaker panel clearly, to indicate which circuits correspond to which lights. This way, you’ll avoid confusion and be able to ensure you’re turning off the correct breaker — the next time you go to wire a light switch.
- Connect with Mandy Sleight on Twitter
- Connect with Mandy Sleight on LinkedIn
- Get in contact with Mandy Sleight via Email
Related Articles